Six-string braiding is more than four-string braiding two leather strings, that relatively will be a little rough, also carry more weight.
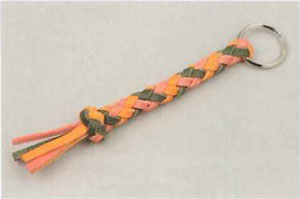
Here to use 1.5 mm thick and 4.0 mm wide leather string. The most we can use 3 kinds of color leather string to match, and suitable to use for thinker wallet rope.
- In the middle of the three leather strings, furl up the three leather strings, and through the circle, in this way can reflexed the leather string from the middle.
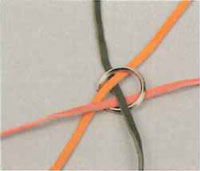

- Reflexed the innermost orange leather string, and then through the pink leather string below, green leather string above, the orange string below and stretched out it below again and come to the front.
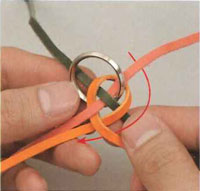
- Reflexed the innermost pink leather string, and then through the green leather string below, pink leather string above and the orange string below, then stretched out to the front.
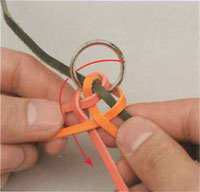
- Reflexed the innermost green leather string, and then through the green leather string below, orange leather string above and the pink string below, then stretched out to the front.
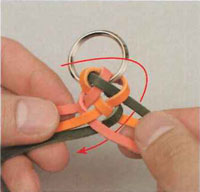
- Put the outermost green leather string around to the front from the rear. As shown in figure, through the pink leather string below, orange leather string above and green leather string below, and move to the right.
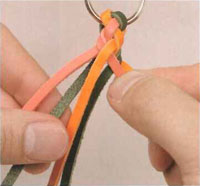
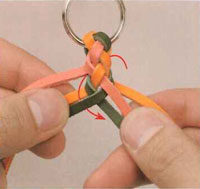
Tip: tighten the leather string, let them closed together evenly.
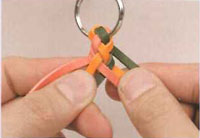
- Put the outermost pink leather string around to the front from the rear. As shown in figure, through the orange leather string below, pink leather string above and green leather string below, and move to the left. The leather string which come out from the front need to cross with the side leather into the grid, and keep cross up and down to braid.
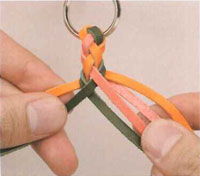
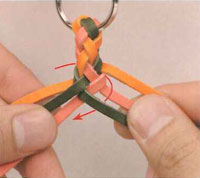
- Repeat steps 5 and 6, until reach the desired length. Pay attention to the degree of density between each leather string.
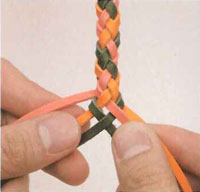
- By the end of braided part need to tie a knot to be fix. First of all use twine tools etc. to fix it temporarily, so that the leather string is not loose away.
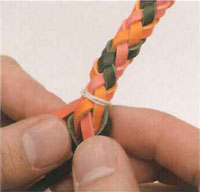
- With the leather string to cross, and also untie the leather string and let them into radial, and then take the rest of the tail around in a circle. Here from the beginning of the orange leather string, first pressure orange leather string which made into circle with fingers, then make the end of pink leather string which at the top and right of the adjacent into the circle, and insert into the circle of orange leather string.
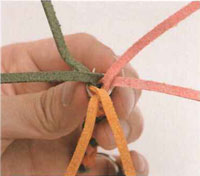
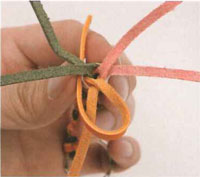
- Pressuring the adjacent leather string of the circle made, and inserting the tip of the leather string into the adjacent circle, and support each other.
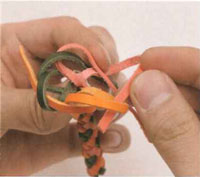
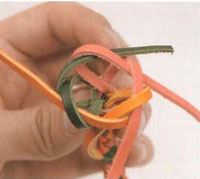
- Pull tighten six leather strings slowly, pay attention that don’t partial off center.
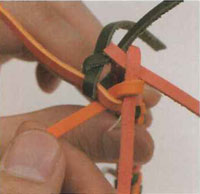
- Put the tip of the leather string in clockwise direction one by one, insert from below into a gap of the ring-down, and then pull out from the center.
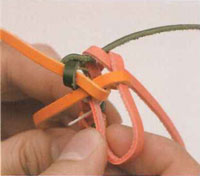
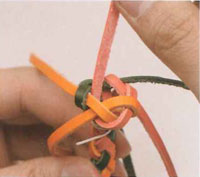
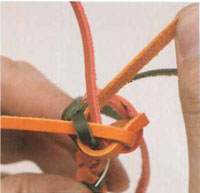
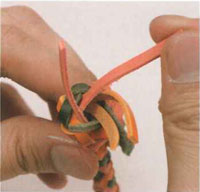
- Pull tighten the six leather strings, pay attention to the strength should be equal when pull the strings. Then remove the twine rope which fixed temporarily.
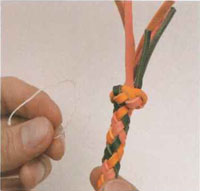
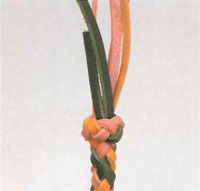
- The tip part of the leather string is circle, and then cut the length of the rest of the leather string to be consistent.
Summary: Braided Leather Technique Tutorial.